

Blog
Print your scrapbook layouts at home
For a long time now digital scrapbooking has been a passion of mine. I have created albums, photos in frames and canvases that hang on our walls. A lot of my creations are given away as gifts. It can also get quite expensive when I have everything printed. So I thought about how I could print digital scrapbook layouts at home. Sometimes I just want to quickly print something – even if it is just in black and white to see how it would look at full scale.
I have successfully worked this out and thought I would share this idea with you in case you wanted to try this at home for yourself.
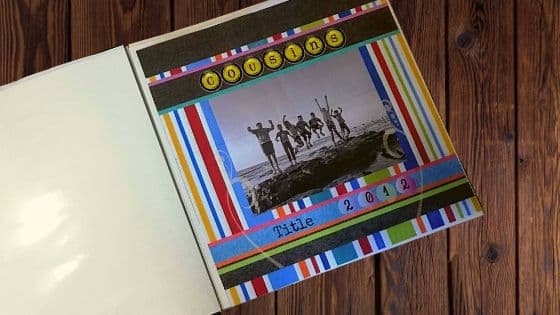
Here is a 12×12 inch layout that I created many years ago and have stored in a scrapbook.
It is printed on photo paper and I love it, so much so that I also had it printed onto a canvas that we have at home. This size photo cost around $10 to have printed and about $30 for a small canvas. If I printed it at a stationery shop onto normal A4 size paper in colour it would cost about $2.60 (65c a sheet) or at home it would only cost the use of your paper and ink.
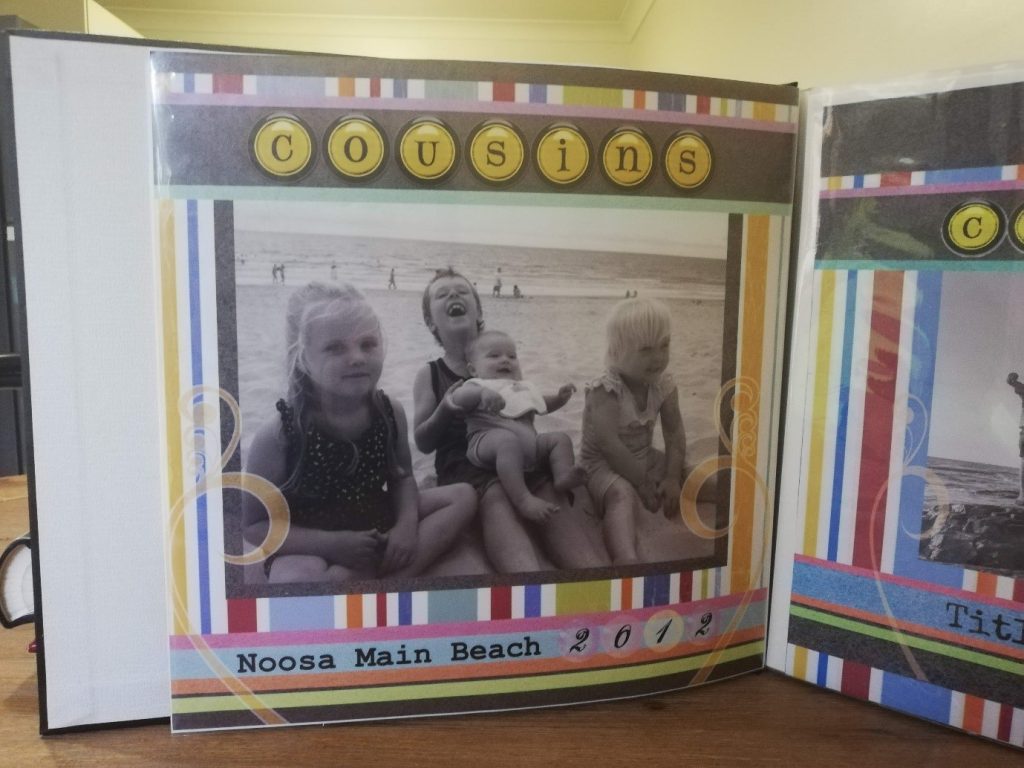
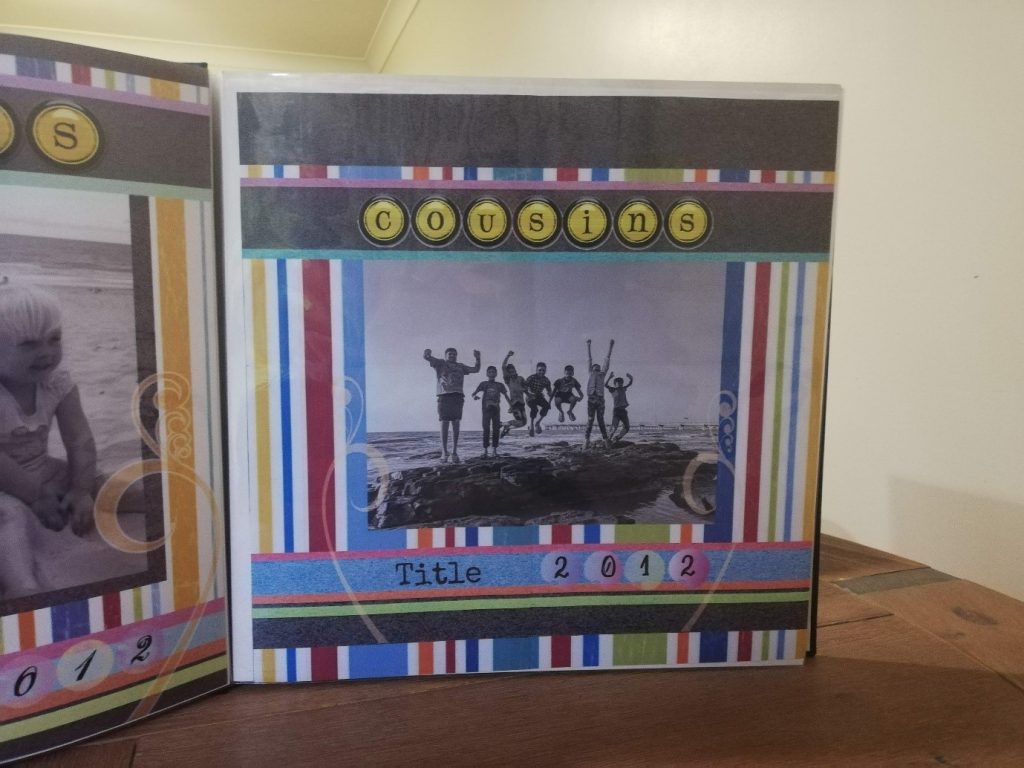
This next photo is the same layout printed as 4x A4 sheets of paper and arranged together to create the effect of being 1 print. As you can see it is hard to pick that it has been printed this way.
Creating the digital image to print your scrapbook layouts at home
I created this layout in Canva which is an online tool that you can use for designing pretty much anything you are wanting to print. You don’t need designer skills to use the program, it is super easy. There is an option to create a free account, just go to www.canva.com if you would like to create one for yourself.
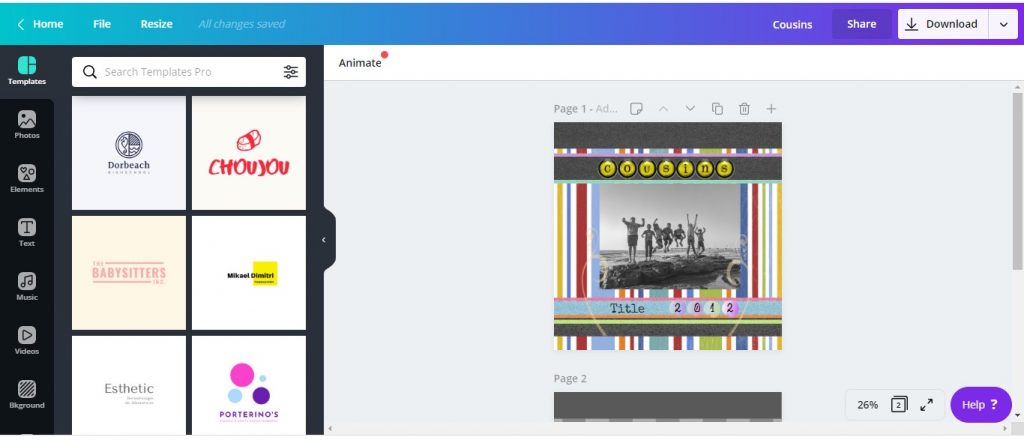
This photo shows the layout in Canva. It is super easy to just drop your own photo into the layout, change the text, then download and print. I have a video on this process if you would like a step by step overview, just click here
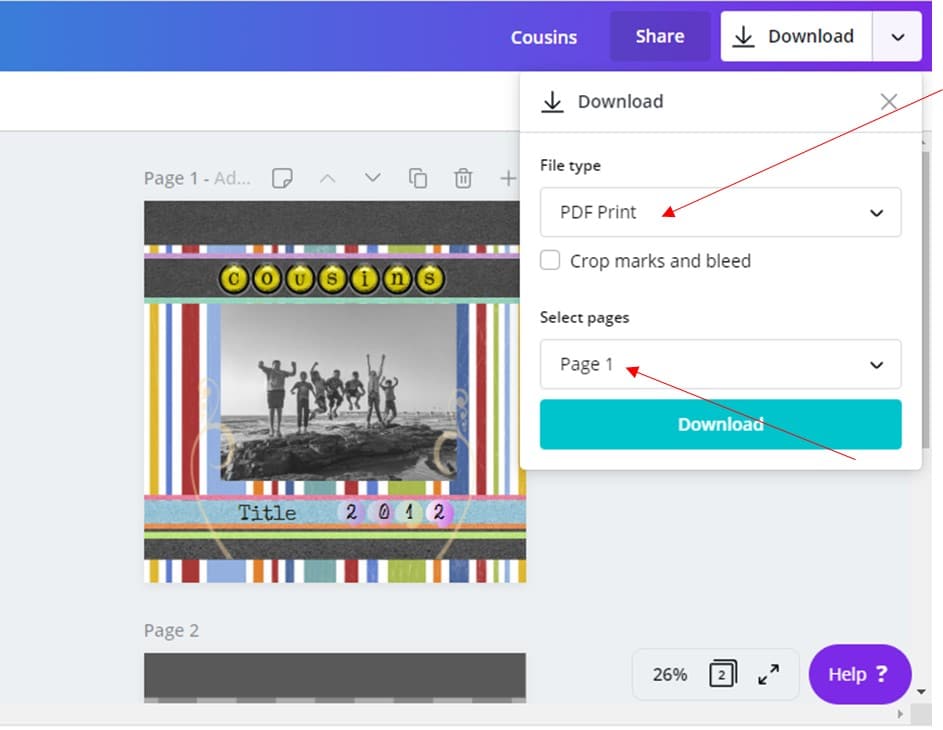
Download your image
Once you have changed the photos, text, colours etc to your liking, you can download this page. You will need to make sure you download it as a PDF and just select the 1 page that you are wanting.
Once this has downloaded, don’t open it, but instead go to Adobe Acrobat Reader that is installed on your PC (if you don’t have this installed, you can download a free version from www.adobe.com) and open the program, then open the downloaded file from in there. If you opened the downloaded file directly there will not be as many options available for you to print correctly.
Print your scrapbook layouts at home
Once opened in Adobe Acrobat Reader, choose print.
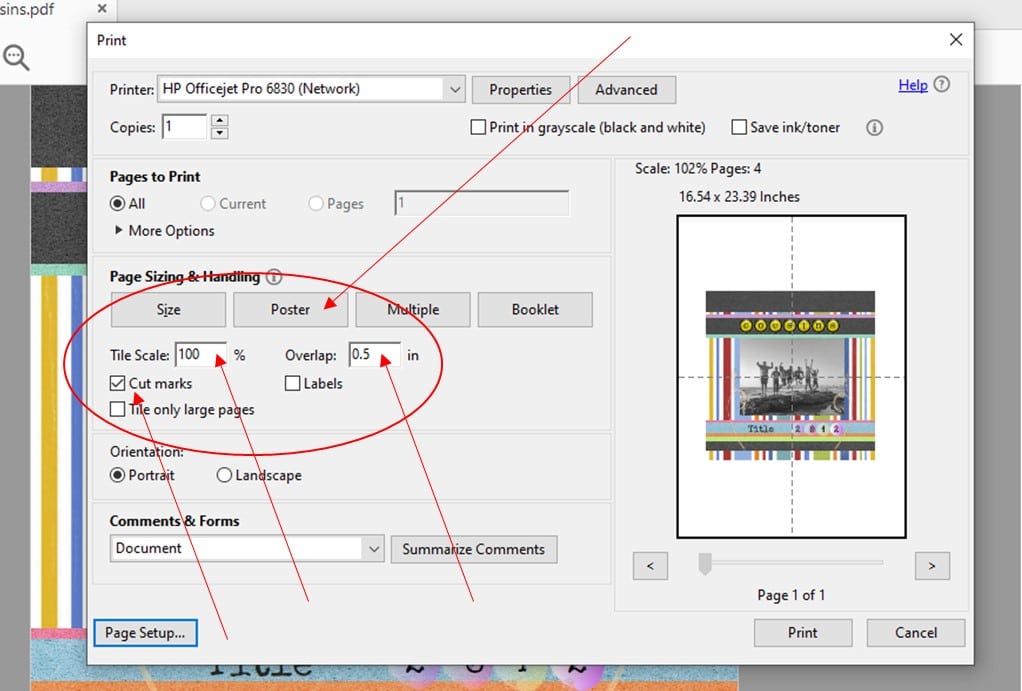
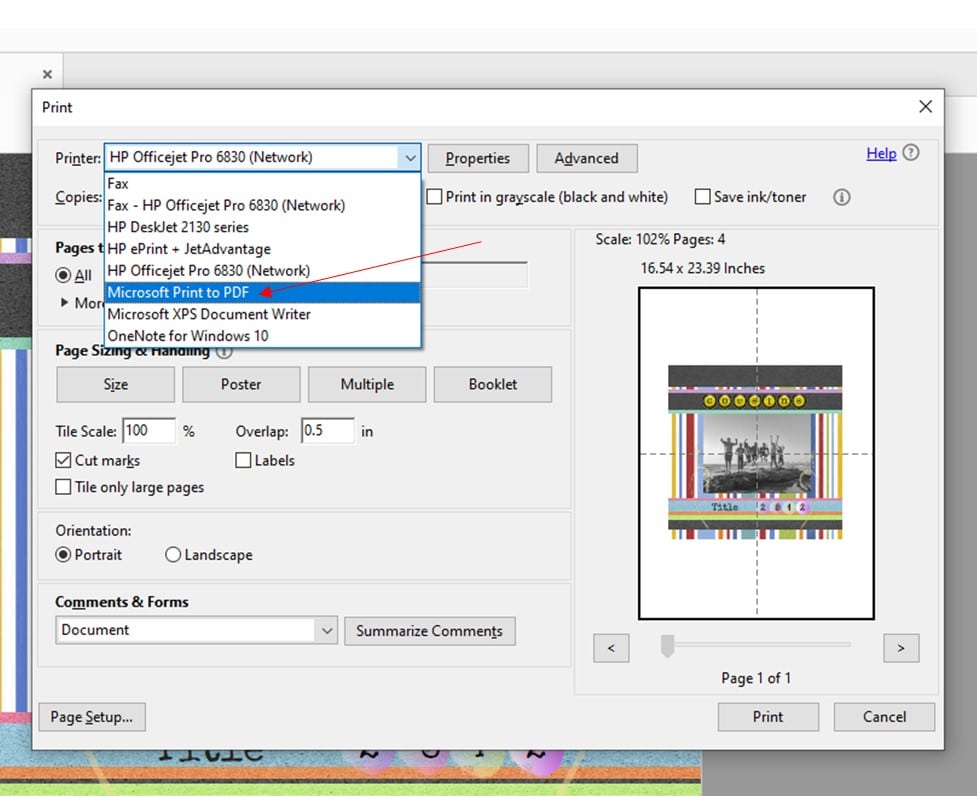
You need to make sure you have selected your home printer at the top, selected “Poster” for the Page Sizing & Handling, make sure the Tile Scale is set to 100% and that the Overlap is set at 0.5 and Cut Marks is ticked. Cut marks will help you to line the pages up correctly once they are printed.
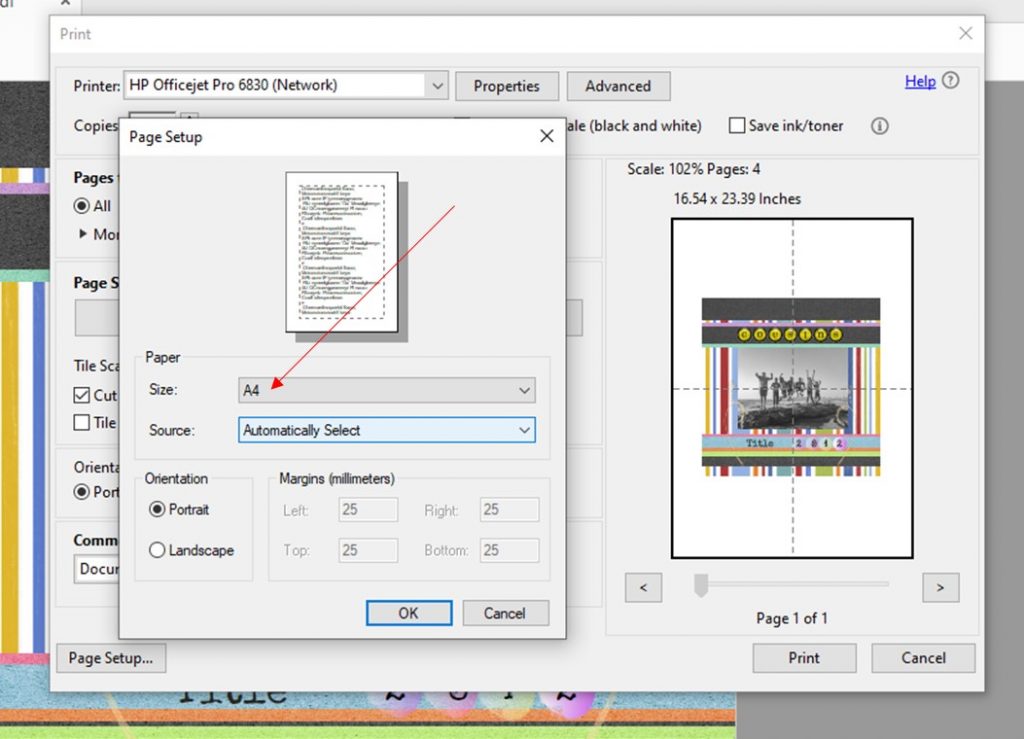
Also make sure that the Page Setup is set to A4
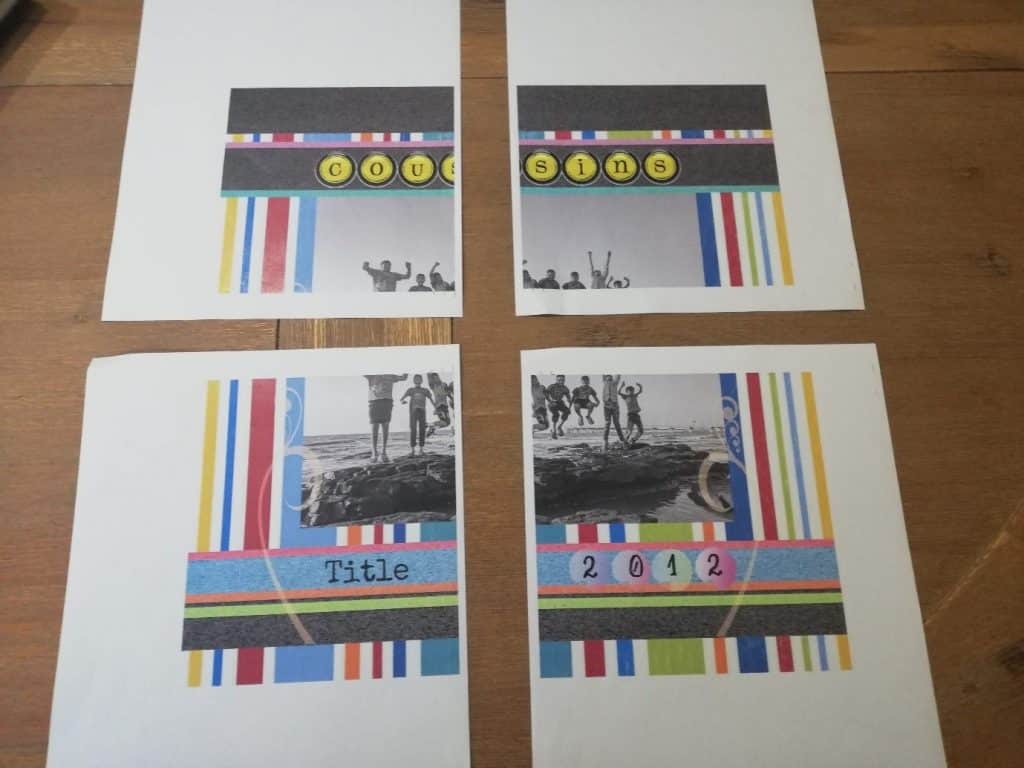
Then you can go ahead and print your digital scrapbook layouts at home The pages should come out like this:
Print your image at a shop
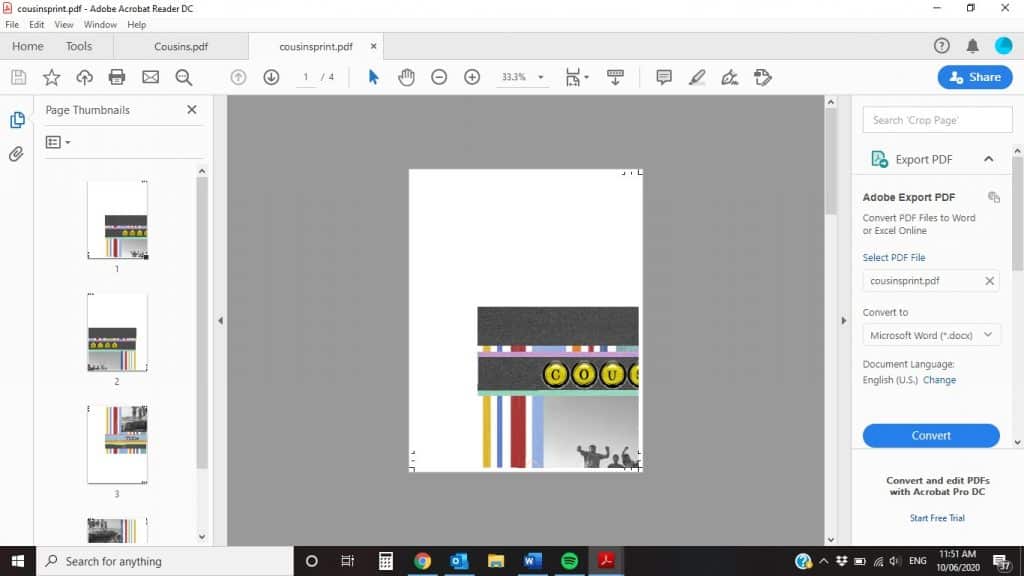
Now if you don’t want to use up your ink and paper from home or you simply don’t have a printer at home, you can save the file as a pdf in Adobe as 4 pages so that when you take it to the stationery shop to print it will print just like this.
So instead of choosing your home printer at the top of the print screen in Adobe, choose Microsoft Print to PDF:
You can then choose where you would like to save this on your computer. The saved PDF when viewed will look like this:
All you will need to do now is to save this file onto a USB drive and take that to the stationery shop to be printed.
Piecing the printed images together
Once you have your printed pages, here is how you piece them together:
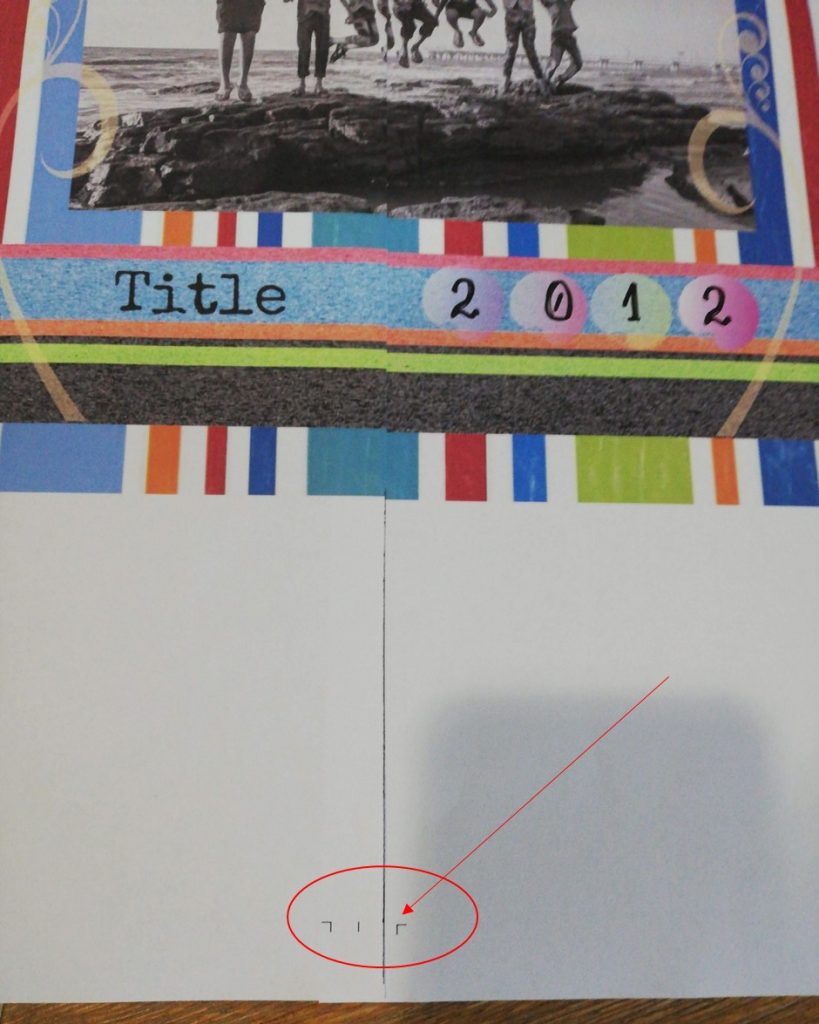
Start by trimming just one page along the photo using the cutmarks at the edge of the page as a guide. That one page can now be aligned with the one next to it. I used some sticky tape on the reverse side of the uncut page and laid the cut page on top, using the cut marks to line it up.
Now you can do the same for the next 2 pages in the same way that you have just done these ones. Make sure you cut the same side as the 1st page, so if you cut the bottom left, then now cut the top left.

Once that is done, you can go and trim either the top 2 pages that are taped together or the bottom 2 pages that are taped together and then line them up with the pages that are left. This is how it should look now:

When you have your 4 pages connected with the tape at the back, you can carefully lift the front of the pages and use a small amount of glue to keep the pages flat on top.
Next you can trim away the excess paper around the entire layout to leave you with a 12×12 inch sheet. When it is inserted into your album it will look fantastic and very difficult to pick that it has been printed this way.
Finished – Now you know how to print your scrapbook layouts at home
So yes, it takes a little bit of time in assembling the pages together, but the end result is worth it, especially if you are wanting to save money on printing costs.
I have made a few free templates available for you to use in your own Canva account if you want to get started and see how easy it is. Just click here to view them.
Want to find the perfect album to fit these templates into once they are printed? Click here to see our Buckram 12×12 inch Scrapbook with refillable pages.
I hope you enjoy creating your own large layouts and the freedom of being able to print digital scrapbook layouts at home or cheaply elsewhere.
Until next time,
Vee